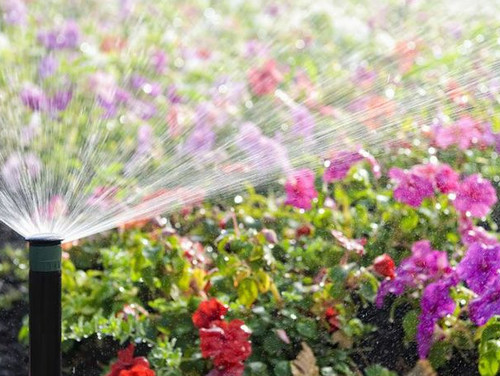
So with the hot months approaching, it’s time to install a sprinkler system—or do some maintenance on your existing one—to ensure your lawn and garden gets all the H20 it needs.
To brush up on the particulars of sprinkler installation and maintenance, read on.
The best time to install a sprinkler system
The best time to install a sprinkler system in your yard depends on your location and climate. But generally, you should put in sprinklers before or after the growing season so flora is not destroyed and there is time for it to grow back nicely, advises David Steckel, an expert from Thumbtack.
“Spring or fall is recommended, or during any sort of major landscaping project,” says Steckel.
The only time you shouldn’t install sprinklers is when the ground is frozen. In cold parts of the country, your sprinkler specialist will want to wait until after things have thawed to make any changes to your irrigation system.
Consult an irrigation professional for sprinkler problems
Some of the most common sprinkler issues include reduced water pressure, inadequate water coverage, timer or wiring issues, and leaks, says DJ Olhausen, a real estate agent with Realty ONE Group Pacific.
These issues can cost you “thousands of dollars in repairs” if they aren’t caught early on, Olhausen says.
But don’t try to diagnose these problems yourself—leave sprinkler system maintenance to the experts.
“Irrigation professionals have the right equipment and know-how to properly repair or install a sprinkler system,” says Dave Holmes, service training manager for The Grounds Guys, a Neighborly company. “We have found that those who install their own irrigation systems often experience stress and concern regarding their systems following the installation.”
Irrigation experts are not just putting pipe in the ground, Holmes explains. They are evaluating your landscape’s plants and grass and providing answers and solutions to what they need.
How to choose the right sprinkler system for you
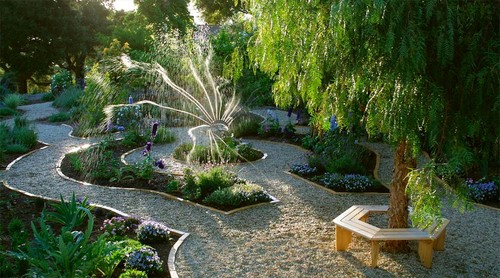
There are a number of ways to get water to your lawn or garden, including sprinkler irrigation, drip irrigation, and surface irrigation. That’s why choosing the correct system for your yard is not a one-size-fits-all solution.
Olhausen tells homeowners to take into consideration the type of climate you’re in, what spray patterns are most ideal for your landscape, what kind of soil your lawn consists of, what your overall budget is, and how your water pressure performs.
You should also think about whether you want an in-ground or above-ground system, and an automatic or manual system.
To the average homeowner, the answers to these questions aren’t obvious. That’s why it’s wise to consult with a professional irrigation company before choosing a sprinkler system.
Sprinkler system costs
Whether you’re installing a sprinkler system for the first time or repairing part of your current sprinkler system, costs vary based on your location and the type of system you have.
The average cost to install a sprinkler system can range from $90 to $800, with more expensive systems costing $1,320 to $5,650, according to Thumbtack. Then, you have to factor in the cost of the actual system.
In-ground sprinkler systems will run about $2,500 to $3,500 for a quarter-acre lot. Drip irrigation systems that are used to deliver water to the plants’ roots and stems cost $1,800 to $2,500 per acre.
Sprinkler repairs, on the other hand, can cost $91 to $300, plus labor.
“In order to save money on future maintenance and repairs, it is important to clean your sprinkler heads and valve to remove dirt, grime, and other residues,” says Steckel. “Also, keep tabs on the water pressure to prevent leaks and check wiring, which may deteriorate due to normal wear and tear.”
:max_bytes(150000):strip_icc():format(webp)/how-to-clean-hard-to-reach-places-4153518-02-88d56a52021b4353bdc2088b06d00c18.jpg)
:max_bytes(150000):strip_icc():format(webp)/how-to-clean-hard-to-reach-places-4153518-03-57594aa4d609421787d487dd238288ca.jpg)
:max_bytes(150000):strip_icc():format(webp)/how-to-clean-hard-to-reach-places-4153518-04-b20b764cf4a34c3d9ed206ba8ce38464.jpg)
:max_bytes(150000):strip_icc():format(webp)/how-to-clean-hard-to-reach-places-4153518-05-7a7bea413fcb4441a909ead85e3618a4.jpg)
:max_bytes(150000):strip_icc():format(webp)/how-to-clean-hard-to-reach-places-4153518-06-5fa5453e6d8e4e28b905bdff698d5617.jpg)
:max_bytes(150000):strip_icc():format(webp)/how-to-clean-hard-to-reach-places-4153518-07-2c99595a36c74ea99d02394c542e2ca1.jpg)
:max_bytes(150000):strip_icc():format(webp)/how-to-clean-hard-to-reach-places-4153518-08-0ef2b5e08a934f51bef3e4107513dc2a.jpg)
:max_bytes(150000):strip_icc():format(webp)/how-to-clean-hard-to-reach-places-4153518-09-d79954ae3beb4ceebfeb33f40639bd1c.jpg)
:max_bytes(150000):strip_icc():format(webp)/how-to-clean-hard-to-reach-places-4153518-10-c19d1d02fe954e8eb652f09bf184f8aa.jpg)
:max_bytes(150000):strip_icc():format(webp)/how-to-clean-hard-to-reach-places-4153518-11-5ac1bd24fdbc440ab1ff4cd1ccb7fce5.jpg)
:max_bytes(150000):strip_icc():format(webp)/how-to-clean-laptops-4177150-05-c80c78c3fe7645ff851248519dd13f54-1e8732eaeafd4170be15e3ef2a11f40f.jpg)


