While replacing a furnace can be pricey, face the facts: It will be necessary at some point. Putting it off too long can actually cost you money—and can be hazardous.
“When your furnace breaks, not only is it uncomfortable, but dangerous,” says Mark Dawson, chief operating officer of One Hour Heating & Air Conditioning. “Many Americans die every year from exposure [to cold] inside their homes.”
Most furnaces are gas-powered central air systems, which first heat air and then blow it out through ducts and vents. But truly understanding how your furnace works is vitally important. Here are a few telltale signs your furnace is about to go kaput.
1. Your furnace has passed the 15-year mark
A furnace should last about 15 to 30 years before you’ll need a replacement, according to the U.S. Department of Energy. But exactly how long yours will last depends on the brand, furnace quality, and its overall efficiency.
“After 15 to 20 years, a furnace’s performance will most likely start to dwindle,” says Dawson. “While you can make repairs to the furnace, over time it’s more cost-efficient to replace the furnace altogether.”
So if your furnace is more than 15 years old, you should start looking into investing in a new one.
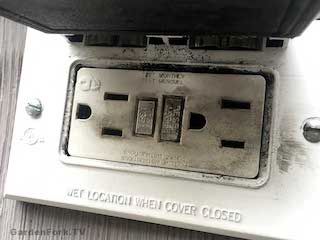
2. You have skyrocketing energy bills
Suddenly getting higher heating bills? This can be a blaring red signal that your system is running less efficiently.
“Over time, motors in the furnace begin to wear and use more energy to do the same amount of work they did when the unit was new,” says Todd Koehler, field manager for American Home Shield, the largest and leading home service plan provider. “This will lead to a pricier bill at the end of the month.”
Another downside to an aging furnace that has not been properly maintained? In addition to the motor, the gas valves and burners can work at a diminished efficiency, which can also cause the furnace to consume more gas.
“We often find a lot of older units showing signs of wear that can lead to inefficient operation up to the point there is a major failure,” says Koehler.
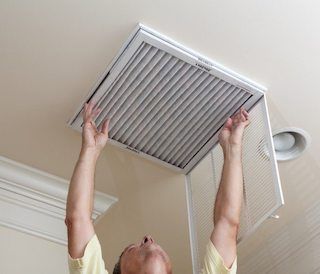
3. You notice elevated dust, soot, or rust particles
Clogged ducts can be the cause of more dirt falling from vents as well as the root cause of improper airflow to parts of the home. Very old systems—especially in homes with pets or smokers—are often in serious need of a thorough duct cleaning. And while a dirty furnace can be a sign of lack of maintenance, it could put you on the express lane to needing a replacement.
“Cleaning the burners for proper combustion will eliminate soot,” says Koehler. “And general maintenance such as duct cleaning and changing the unit’s filters will fix the dust issue.”
Plus, you’ll add to the life of your furnace in general. However, if there’s still a lot of dust after a thorough cleaning, a new furnace may be in order.
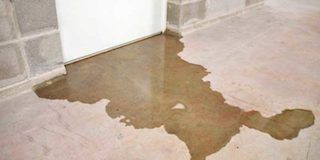
4. There’s too much humidity in the home
“A combusting furnace will dry out the air and remove humidity, which is normal,” says Koehler. But over time, the heat exchanger can develop thermal fuel residue. That residue will prevent your furnace from heating up enough to then remove humidity from the air. This can lead to higher than normal humidity—the ideal balance is between 30% to 40%—in the home.
“The opposite issue can also occur if the unit develops heat spots from years of operation,” adds Koehler. “Replacing the unit will help resolve these issues.”
5. Rooms heat unevenly
When your kitchen is hot while your den is freezing, it’s probably time to replace your furnace.
“The furnace isn’t pushing out the necessary heat throughout the home as it should,” says Dawson. “While you could have a licensed professional make repairs to the furnace, it’s a short-term solution—and the bigger problem will eventually have to be addressed.”
A good rule of thumb is if a repair costs about 50% or more of a new furnace, you should get a new one, adds Dawson.
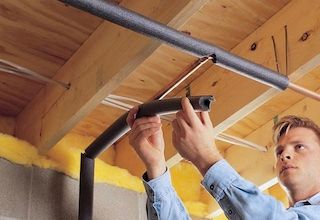
6. Your furnace is noisy
Is your furnace loud? Or making more rattles, buzzes, or hums than a jazz trio? Then cracks, leaks, or other structural issues may be trumpeting that a new furnace is in order.
“There shouldn’t be any odd sounds coming from the furnace, apart from the typical noises a furnace makes when starting up,” says Dawson.
If you do notice things going thump in your furnace, it’s likely time to hire a licensed professional to do a maintenance check. Just keep in mind odd sounds are one of the first indicators that the furnace will need to be replaced soon.
“Cracks in the system or leaks might be more costly to repair than just biting the bullet and investing in a new furnace,” Dawson says.