Are you on the fence about whether to sell your house now or hold off? It’s a common dilemma, but here’s a key point to consider: your lifestyle might be the biggest factor in your decision. While financial aspects are important, sometimes the personal motivations for moving are reason enough to make the leap sooner rather than later.
An annual report from the National Association of Realtors (NAR) offers insight into why homeowners like you chose to sell. All of the top reasons are related to life changes. As the graph below highlights:
As the visual shows, the biggest motivators were the desire to be closer to friends or family, outgrowing their current house, or experiencing a significant life change like getting married or having a baby. The need to downsize or relocate for work also made the list.
If you, like the homeowners in this report, find yourself needing features, space, or amenities your current home just can’t provide, it may be time to consider talking to a real estate agent about selling your house. Your needs matter. That agent will walk you through your options and what you can expect from today’s market, so you can make a confident decision based on what matters most to you and your loved ones.
Your agent will also be able to help you understand how much equity you have and how it can make moving to meet your changing needs that much easier. As Danielle Hale, Chief Economist at Realtor.com, explains:
“A consideration today’s homeowners should review is what their home equity picture looks like. With the typical home listing price up 40% from just five years ago, many home sellers are sitting on a healthy equity cushion. This means they are likely to walk away from a home sale with proceeds that they can use to offset the amount of borrowing needed for their next home purchase.”
Bottom Line
Your lifestyle needs may be enough to motivate you to make a change. If you want help weighing the pros and cons of selling your house, connect with CA Real Estate Group today.
When you’re thinking about buying a home, your credit score is one of the biggest pieces of the puzzle. Think of it like your financial report card that lenders look at when trying to figure out if you qualify, and which home loan will work best for you. As the Mortgage Report says:
“Good credit scores communicate to lenders that you have a track record for properly managing your debts. For this reason, the higher your score, the better your chances of qualifying for a mortgage.”
The trouble is most buyers overestimate the minimum credit score they need to buy a home. According to a report from Fannie Mae, only 32% of consumers have a good idea of what lenders require. That means nearly 2 out of every 3 people don’t.
So, here’s a general ballpark to give you a rough idea. Experian says:
“The minimum credit score needed to buy a house can range from 500 to 700, but will ultimately depend on the type of mortgage loan you’re applying for and your lender. Most lenders require a minimum credit score of 620 to buy a house with a conventional mortgage.”
Basically, it varies. So, even if your credit isn’t perfect, there are still options out there. FICO explains:
“While many lenders use credit scores like FICO Scores to help them make lending decisions, each lender has its own strategy, including the level of risk it finds acceptable. There is no single “cutoff score” used by all lenders, and there are many additional factors that lenders may use . . .”
And if your credit score needs a little TLC, don’t worry—Experian says there are some easy steps you can take to give it a boost, including:
1. Pay Your Bills on Time
Lenders want to see that you can reliably pay your bills on time. This includes everything from credit cards to utilities and cell phone bills. Consistent, on-time payments show you’re a responsible borrower.
2. Pay Off Outstanding Debt
Paying down what you owe can help lower your overall debt and make you less of a risk to lenders. Plus, it improves your credit utilization ratio (how much credit you’re using compared to your total limit). A lower ratio means you’re more reliable to lenders.
3. Don’t Apply for Too Much Credit
While it might be tempting to open more credit cards to build your score, it’s best to hold off. Too many new credit applications can lead to hard inquiries on your report, which can temporarily lower your score.
Bottom Line
Your credit score is crucial when buying a home. Even if your score isn’t perfect, there are still pathways to homeownership. Let’s connect if you want to go over your options with an expert.
Let’s connect and plan your next steps. Find out if we’re the right real estate team for you!
For many families, the kitchen is the social hub of the home, so it’s important that you clean often. Some areas of your kitchen will require consistent attention, such as the counters. Others, like larger appliances such as the refrigerator or oven, can be addressed on a weekly or perhaps monthly basis.
Below, you’ll find daily, weekly, monthly, and seasonal kitchen cleaning checklists to simplify your routine. These detailed guides will help you create and maintain a tidy kitchen space.
Supplies You’ll Need
Before you get started, make sure you have the proper tools and cleaning solutions on hand. The following is a comprehensive list, detailing all of the supplies you need for the four kitchen cleaning checklists in this guide.
For your daily kitchen cleaning checklist, focus your attention on the counters and floors. Keeping these high-use areas clean will help you cultivate a more hygienic environment.
Remove any decor, appliances, or clutter from the countertops.
Wipe down the counters with a clean, damp cloth and an all-purpose cleaner or warm, soapy water. You can also use a DIY all-purpose cleaner, made of diluted vinegar. Consider wiping down high-use areas at this time as well, such as the drawer and cabinet pulls and the handle on your microwave.
Sweep the floors.
Return the items you moved to their proper homes on the countertop or elsewhere.
Unload your dishwasher and tackle any dirty dishes by handwashing or loading the dishwasher.
Wipe down the faucet and inside of your sink with an all-purpose cleaner. Pay close attention to any corners and crevices that may be collecting grime.
Take out the trash and recycling.
Put any cleaning rags or kitchen towels in the laundry and replace them with clean ones.
Weekly Kitchen Cleaning Checklist
In addition to your daily cleaning regimen, your weekly routine should include frequently used appliances like your microwave and refrigerator. Start your weekly cleaning routine with the steps below, then finish with your daily kitchen cleaning checklist above.
Clean the interior and exterior of your countertop kitchen appliances, including your toaster, coffee maker, and microwave.
Next, it’s time to clean the refrigerator. You’ll need to rearrange or remove items as you clean, so you’re able to wipe down all of the shelf and drawer space. As you go, check for expired goods and toss them. Remember to wipe down the face and handles of your refrigerator too. (Save the freezer for your monthly kitchen cleaning checklist.)
Wipe down your stovetop with a store-bought or DIY all-purpose cleaner. Don’t forget to wipe down the face of your oven too.
Next, wipe down additional high-use areas, such as light switches, drawer pulls, cabinet handles, and door knobs.
Turn off (at the breaker box) and clean your garbage disposal, using distilled white vinegar and baking soda.
Finally, you can move on to the daily cleaning checklist and finish your weekly routine by mopping your kitchen floors.
Tip
During your weekly kitchen cleaning routine, take a look at your supplies and see if any cleaning solutions or tools need to be replaced or replenished. Take this opportunity to add those items to your grocery list.
Monthly Kitchen Cleaning Checklist
Your monthly kitchen cleaning checklist provides an opportunity to tidy and disinfect areas that are not frequently used, but still collect dust and grime over time. This includes cabinet and drawer faces, windows, and even the inside of your garbage can. Start with your daily kitchen cleaning checklist, then move onto the tasks below.
Remove the contents of your cabinets and drawers to prepare for cleaning and organizing (we recommend following steps three and four for one cabinet or drawer at a time). This includes your pantry.
Wipe out the inside of your drawer or cabinet with an all-purpose cleaning solution, then move onto the cabinet or drawer face.
Return the contents of your cabinet or drawer, organizing as you go. Move onto the next drawer or cabinet and repeat steps three and four until you’ve tackled all of the storage space.
Wipe down any tiles and grout, such as a kitchen backsplash, with your all-purpose cleaner.
Next, wipe down areas that may be collecting dust, such as the tops of cabinets and light fixtures.
Clean the inside of your dishwasher with a soft abrasive brush or sponge, distilled white vinegar, and baking soda. Be sure to wipe down the face of your dishwasher with an all-purpose cleaner when you’re finished.
Seasonal Kitchen Cleaning Checklist
While the checklists above will help you maintain a clean and sanitary kitchen, there are a few leftover tasks you should complete every few months.
Set your oven to the self-clean setting. Keep in mind this process requires some prep (such as removing the racks and turning on the oven vent) and can take a couple of hours.
Using a microfiber cloth and all-purpose cleaning solution, wipe down the ceiling and walls in your kitchen. When you complete this step, pay close attention to areas that may have gathered grease or steam, such as the wall behind your kitchen faucet and the ceiling area above your vent hood.
When you empty and deep clean the cabinets and drawers in your kitchen (during the monthly kitchen cleaning checklist), search for any kitchen tools and utensils you can donate or toss. For cabinets or drawers with food (as well as the pantry), see if there are any items that need to be replaced or replenished, such as expired goods or spices running low.
Unplug your refrigerator and pull it away from the wall. Clean the top of your fridge, the floor underneath it, and even the coils behind it. Use a microfiber cloth and all-purpose cleaner for the top of your refrigerator and the coils, then a broom, dustpan, and mop for the floor. Plug the refrigerator back into the outlet, then return it back to it’s proper home.
Tips for Sticking to Your Kitchen Cleaning Schedule
Following the kitchen cleaning checklists above will take time and discipline, but there are several tips you can use to help you keep up with the chores.
Schedule kitchen cleaning days in your calendar. This is especially important for your monthly and seasonal kitchen cleaning checklists.
Keep your kitchen organized.Maintaining an organized kitchen will help prevent clutter, optimize your food storage, and notice and address any grease, spills, and other debris quickly.
Store your cleaning supplies in bins. Keeping the supplies needed for each checklist in labeled plastic bins can help you grab what you need quickly when it’s time to complete a cleaning checklist.
Declutter often. Instead of waiting until it’s time to complete your kitchen cleaning checklist, make sure you are frequently looking for and removing any expired products or tools/utensils that aren’t being used.
The high mortgage rates that have paralyzed America’s housing market are falling—and could nosedive further by the end of the year.
Rates for a 30-year fixed mortgage plunged to 6.47%—the lowest in over a year—for the week ending Aug. 8, according to Freddie Mac.
And with inflation losing steam and the economy cooling, expectations are high that the Federal Reserve could make not just one, but two rate cuts by the end of this year.
As a result, Realtor.com® senior economist Ralph McLaughlin expects mortgage rates to drop further in September and December, which is “encouraging news for potential homebuyers who have been waiting to participate in the market.”
This is also encouraging news for homeowners who might be thinking of selling. Is it time to finally list their property on the market? And if they do, what should they expect?
To help shed some light on what’s coming down the pike for home sellers, here’s what real estate experts predict will happen to the housing market once rates take the plunge.
The ‘lock-in effect’ will ease—and homeowners will start selling
A recent Realtor.com analysis found that 86% of homeowners have mortgage rates below 6%. Understandably, many feel “locked in,” unwilling to trade in their low rate for today’s higher ones if they sell and buy again.
“Home sellers have been sitting on the sidelines, not wanting to give up their COVID-era interest rates,” says Tan Tunador, vice president and senior loan officer with Atlantic Coast Mortgage.
But once rates drop further, that could change.
“The faster rates drop, the less homeowners will be held in place and we could see both new inventory and more sales,” says Danielle Hale, chief economist of Realtor.com.
“There are a significant number of sellers that couldn’t stomach—right or wrong—going from a 4% rate to a 7.5% rate,” says Mason Whitehead, a Dallas-based branch manager for Churchill Mortgage. “But they can stomach going from 4% to something in the 5% to 6% range.”
More homebuyers will enter the market
In the same vein that sellers have felt frozen in place, buyers have felt iced out of the market. But if mortgage rates continue to decline, then experts predict more buyers who’ve been on the sidelines finally jump into the market.
“When rates drop, I think you will see pent-up demand hit the market again,” says Whitehead.
Some buyers, like sellers, shelved their house hunt because they felt the payment was too high, but a lower rate makes home shopping more affordable.
“For some that didn’t qualify at 7.5%, they will qualify at 6%,” says Whitehead. “So you have more people able to buy as well.”
In other words, once rates fall, the market will see both more sellers willing to sell, and buyers willing and able to buy.
Sales will come on fast and strong
Any seller thinking of listing would be wise to start prepping right now.
“Mortgage rates have been improving, and they are bringing potential buyers out early, many of whom gave up on buying, either because of the low housing inventory or the higher rate environment the past few years,” says Tunador. “For sellers, listing their house early may give them the opportunity to sell before their competition hits the market.”
Other experts agree: There are definitely signs homebuying activity is beginning to bounce off the mat.
“Mortgage applications have perked up, and refinancing activity also looks to be picking up as rates go lower and owners carrying elevated mortgage rates seek to reduce their monthly payments,” says Charlie Dougherty, director and senior economist at Wells Fargo.
“All told, mortgage applications remain low, but the recent upturn is a promising sign that buying activity is starting to heat up and defrost a housing market frozen by higher interest rates,” adds Dougherty.
And if mortgage rates continue to shift south, things might get even toastier.
“When mortgage rates [stay in] a sub-6.5% average, we will really see the housing inventory increase and sales activity boom,” says Tunador.
Home prices will likely remain high
The good news for sellers is that even as the market gets moving, home prices are expected to remain high, or dip only slightly.
“Sellers will continue to be in a historically strong position, as the U.S. housing market is still short millions of homes,” says Dan Hnatkovskyy, co-founder and CEO of NewHomesMate. “Assuming there isn’t a severe recession, we will likely see only modest price decreases in most markets in 2024.”
However, Hnatkovskyy says that formerly hot markets like Denver, Austin, TX, and Phoenix may see a more significant drop in housing prices as smaller investor money sits on the sidelines for most of 2024. But in general, experts don’t see home prices taking a major dive as interest rates start to descend.
Even so, it will be smart for sellers not to get too cocky with their home pricing.
“Sellers may benefit from realistic pricing and encouraging buyer competition,” says Cassandra Happe, an analyst for WalletHub. “Working with a real estate agent to price strategically and enhancing online presence with 3D tours can maximize the chances of a quick and profitable sale.”
In other words, sellers shouldn’t set their hopes price too high lest they price themselves out of the market.
“Housing affordability will likely remain strained given still-high mortgage rates and the rapid run-up in home prices over the past three years,” says Dougherty. A shaky economy could “keep the pace of home sales relatively tepid.”
Multiple offers may make a comeback
The increase in competition among buyers might mean that sellers once again find themselves in the enviable position of being able to choose from several offers for their homes.
“Sellers will be in luck when mortgage rates start to drop: They’ll have multiple offers to consider and have some extra leverage when negotiating,” predicts Bryson Taggart, senior agent partnership manager for Opendoor. “For example, sellers receiving multiple offers can drive up the price of their home or waive contingencies for an easier close and a more convenient timeline.”
Still, sellers need to remember that the highest offer isn’t always the best offer.
“I advise sellers to evaluate offer terms holistically and select the one that aligns best with their wants and needs,” says Taggart.
For some, that could be an offer from a more qualified buyer or a cash buyer, which provides less of a risk for fall-throughs. If a seller is planning to also purchase a home, they should pick a buyer with favorable terms for an efficient close.
Wabi-sabi is a centuries-old Japanese philosophy that embraces imperfection, simplicity, and the natural passage of time.
When designing your home, one thing to consider is the aesthetic that you’re striving for. Are you leaning towards a more romantic, cozy look? Then embracing rom-com decor may be the way to go. Prefer to opt for a lived-in, organic look? Then wabi-sabi might be the philosophy for you.
Wabi-sabi isn’t a design trend but an entire life philosophy that’s rooted in the Japanese idea that imperfect, natural, and organic elements are what make our spaces and everyday lives beautiful. It’s an idea that can make life more relaxing because you’re not running around worried about the pursuit of the new and the perfect. Instead, you focus on an appreciation for your current surroundings and the passing of time.
“By recognizing the imperfect and fleeting, wabi-sabi design nurtures a profound appreciation for the present moment and the inherent beauty in life’s impermanence,” says Lauren Lerner, principal designer and CEO of Living With Lolo. Ahead, our experts explain what wabi-sabi is and how you can incorporate this philosophy into your home.
Lauren Lerner, principal designer and CEO of Living With Lolo, a full-service interior design and build studio that offers a specialization in wabi-sabi design
Joel Wong, co-founder of OWIU Design, a full-service architecture and design studio that specializes in thoughtful design practices
Design that centers around wabi-sabi embraces imperfection, simplicity, and the natural passage of time, according to Lerner. “This philosophy celebrates the beauty found in the transient and imperfect nature of all things,” she says.
Originating from 16th-century Zen Buddhist Japanese monks, adhering to a wabi-sabi philosophy means using natural materials that will show their age throughout the years, welcoming a graceful patina, and always looking to organic materials from the earth over synthetics. “Wabi-sabi designs often showcase organic shapes and asymmetry, mirroring the irregularities present in nature,” Lerner says.
Joel Wong, co-founder of OWIU Design, uses wabi-sabi throughout his architecture and design firm’s work. “Spaces are made to evolve with their inhabitants, and that means allowing the aging of the space to simply be a natural element of it. The feeling of wabi-sabi should evolve with you! It is dynamic, just like we are dynamic as people; it needs to be personal to you,” says Wong.
Because of its fluid nature, the look of wabi-sabi depends on the person within the space.
How to Bring Elements of Wabi-Sabi Into Your Home
Wabi-sabi doesn’t require redecorating or going out and buying all new items. It simply means encouraging more natural materials, realizing that life is always changing and growing, embracing the patina on your items, and infusing your sense of comfort into a space. Here are some ways these experts recommend bringing the elements of wabi-sabi into your home.
“Wabi-sabi is a philosophy rather than a set of rules or parameters to follow. Wabi-sabi for me may not be wabi-sabi for you. Don’t take the term as is,” says Wong. “In fact, a lot of Japanese (or rather, foreign) words lose their depth when they get translated into English, so it’s important to understand that there’s more substance to this abstract term.”
This is a way of life, and that means it’s going to look different for everyone. One person may fill their space with neutrals, while another brings in color. But both will keep the décor authentic to their sense of style and celebrate the natural world.
02 | Embrace Wear and Tear
“Wabi-sabi embraces wear and tear as a natural and organic process while being able to find beauty in it,” says Wong. Rather than stressing over a ding in your coffee table or tarnishing on metal items, celebrate them as a marker of a life well lived.
03 | Choose Organic Materials
Not all materials will develop a beautiful patina that echoes the wabi-sabi philosophy. Natural materials will age well over time, while synthetic materials are more likely to look tired. “Organic materials will age gracefully,” Wong says. “Wabi-sabi is about choosing organic materials like wood and shikkui plaster, which is a type of Japanese plaster that is made out of seaweed fibers. They’re natural and age really nicely.”
Wabi-sabi emphasizes welcoming the passage of time both in life and your home. Nothing is ever perfect or finished—it’s all a journey. “Allow for growth and evolution in your spaces. This sounds abstract but it simply means not to strive for perfection, but rather a high enough and realistic standard that at the same time still provides a level of comfort,” says Wong.
This means that even if your home isn’t your dream space today, you can still find beauty and comfort in it now.
05 | Invest in Quality
“Invest in nice pieces that you will have for life instead of buying one that serves as a means to an end. Higher quality items age with you. Of course, repair them when the time comes instead of replace,” says Wong.
These items encourage seeing the craftsmanship and beauty in them, while romanticizing the details. You can more fully immerse yourself in your surroundings when there are fewer, higher quality items.
06 | Tell Your Own Story
Not everything in a wabi-sabi space should be purchased or intentionally designed from the home. Part of wabi-sabi is bringing in elements from the natural world that tell your own story. These items should evoke the senses and bring back personal memories. “It can mean picking up rocks from random trips and using them as bookends or table centerpieces,” says Wong.
“Simplicity reigns supreme in wabi-sabi, with an emphasis on minimalism and uncluttered spaces that evoke tranquility and understated elegance,” says Lerner. Each item in your space should feel intentionally chosen. Nothing is there by chance.
08 | Choose Earth Tones
While you should use the colors that speak to you, wabi-sabi traditionally incorporates neutrals that are found within the natural world. “The use of earthy, subdued colors and textures further enriches the serene and authentic ambiance,” says Lerner. “Embrace a subdued, earthy color scheme to evoke a connection to nature and foster a peaceful setting.”
“Seek furniture and decor featuring organic shapes and subtle flaws that celebrate each piece’s unique charm,” says Lerner. Furniture with rounded lines and soft edges evokes the curvy, organic silhouettes we see in nature, particularly when they are made from stone, wood, and other natural materials.
10 | Incorporate Homemade Items
Seeing the handprints of real people on items is another way to feel connected to the moment and time. “Integrate handmade goods and artisan crafts, bearing the artisan’s touch and narrative,” says Lerner. This forces you to pause and consider who made the item, what inspired them, and how humans are capable of creating beautifully imperfect art.
11 | Find Beauty in Age
Your home becomes an inviting, peaceful place to be when you embrace the elements of wabi-sabi that discourage seeing our physical world as something to be thrown away as it ages. “Embrace the passage of time in your living space,” Lerner says. “Welcome patina, signs of use, and the natural maturing of your possessions. By cherishing the beauty in imperfections and impermanence, craft a home that is cozy, welcoming, and profoundly intimate.”
Frank Lloyd Wright is arguably the most legendary American architect and one of the most recognized architects in the world. Wright designed hundreds of residential, commercial, and civic buildings as well as furniture and other structures throughout the United States, earning numerous National Historic Landmark and UNESCO World Heritage designations.
Born in Wisconsin in 1867, Wright’s career officially began in Chicago in the 1880s. He dedicated seven decades to creating and teaching architecture and design, resulting in thousands of designs and hundreds of built locations, many of which remain today. His home bases included Illinois, Wisconsin, and later Arizona, where he eventually died.
As a residential architect, he was known for his Prairie Style and design philosophy that embraced nature and created homes that blended with and incorporated the surrounding landscape. His work influenced everything from open floor plans to furniture design. Designing during two World Wars and the Depression, he also developed affordable housing while strongly advocating that small and affordable homes could still be thoughtfully and beautifully designed.
Here, we highlight 13 houses designed by Frank Lloyd Wright that you can tour in the United States. They span the length of his career, from the 1880s through the 1950s, and are a mix of grand historic sites and smaller, locally run houses—some of which only opened to the public in the past decade. As such, their accessibility varies, too: while some may offer tours year-round, others may have set available times or require special booking; many require advanced ticket purchases rather than day-of admission at the door.
01 | Frank Lloyd Wright Home and Studio: Oak Park, Illinois
This is Wright’s first home and studio as an architect, where he lived from 1889 through 1909. It was his first solo work where he had complete artistic control, and Wright altered its structure both while he lived there and after, including updates for later owners.
The initial structure was his home at an important time in Wright’s life, including his influential work under architect Louis Sullivan and when he struck out on his own in 1893. Leading his own successful company, Wright added a studio to the home in 1898. Today, the buildings include colorful stained glass, painted murals, and many international motifs. The shingle-styled exterior feels significantly different from his later iconic Prairie School works.
Visit:Guided tours of both the home and studio are available.
02 | Taliesin: Spring Green, Wisconsin
Located in the area of his family’s ancestral home, the 800-acre estate around Taliesin is a deeply personal location to Wright. The area includes buildings developed throughout his career, from the Wright-designed interior of the 1886 Unity Chapel to the estate’s visitor center, completed in the 1960s after Wright’s death.
The name Taliesin refers specifically to the 37,000-square-foot home that Wright not only designed but lived and worked in. It was developed in three phases between 1911 and 1925. Much like Wright himself, the house has a tempestuous history, including multiple fires and murder.
The Taliesin house sits on a property that includes many other sites designed by Wright, including a barn (1952) and windmill (1897). Before he developed Taliesin, Wright built the Hillside School (1903) for his aunts and a home for his sister’s family (1907) on the property. The school became the home of the Wright Fellowship, which started in the 1930s.
Visit: Multiple tour options allow you to explore the Taliesin house, grounds, and other buildings on the site.
03 | Hollyhock House: Los Angeles, California
One of Wright’s earliest homes on the West Coast belonged to Aline Barnsdall. The heiress to an oil fortune, she sought out Wright to help design an artists’ community on a 36-acre plot in the Hollywood area in 1919.
Wright included Barnsdall’s favorite flower, hollyhocks, throughout the design, including roof finials, furniture, art glass windows, and ornamental friezes and accents. Very different from many of his other works—particularly the works on this list—the Hollyhock House has Mayan influences, Art Deco details, and is constructed of hollow-clay blocks with a stucco coating and cast stone ornamentation.
Ultimately, the house and structures Wright had begun developing were not what Barnsdall was looking for, and in 1927 she gave the city of Los Angeles stewardship of the house, another Wright-designed guest house, and some of the land.
Completed in 1909, the Robie House is a stand-out example of Wright’s Prairie School aesthetic: a style that reflects the prairie’s ongoing horizon. The Robie House is strikingly horizontal—one of the signature characteristics of the style—from the overall shape to the details, such as the orientation of the brick and mortar on the outside. It features a large, long living space separated by a fireplace, which is iconic to many of Wright’s designs as well. Wright also designed some of his more recognizable furniture for this house, including the Robie chair and Robie sofa.
Early in his career, Wright showed an interest in affordable housing production. Wright collaborated with Arthur L. Richards in Milwaukee to create affordable, easy-to-build yet stylish homes. American System-Built Homes were developed by Wright between 1911 and 1917 (the U.S. entry into WWI stopped progress). American System-Built Homes were cut at a factory, then shipped for on-site assembly. To demonstrate the concept, Richards built six of Wright’s homes on Burnham Street in south Milwaukee.
According to the Frank Lloyd Wright Foundation, more than a dozen dealers sold these home designs, with multiple built across Iowa, Illinois, and Indiana, in addition to Wisconsin. These homes may be recognized from the most recent season of Top Chef, where the crew visits Burnham (along with Taliesin) in episode four.
Darwin Martin was an important figure in Wright’s career who hired Wright to construct multiple properties for his family, as well as offering Wright his first commercial commission. Initially, Martin had Wright design a house for his sister; the Barton House, as it is known, was completed in 1903.
Completed four years later on the same property, Wright developed Martin’s family home, adding a pergola, conservatory, and carriage house. A cottage was added in 1909. The Martin House architecture features Wright’s classic cantilever design, and its details include 16 different abstract patterns of art glass, including Wright’s legendary “tree of life” pattern.
Today, the property is home to the Barton and Martin houses, as well as the 1909 cottage. The carriage house, conservatory, and pergola were demolished in the 1960s but rebuilt in the mid-2000s, according to Wright’s original drawings.
Visit: Multiple tour options are available to see the Martin House as well as the Barton House and other buildings on the grounds. There is an option that includes Martin’s Graycliff summer estate, also designed by Wright, located in nearby Derby, NY.
07 | Fallingwater: Mill Run, Pennsylvania
In 1991, the American Institute of Architects called Fallingwater the “best all-time work of American architecture.” Fallingwater was originally a summer home commissioned by Edgar and Liliane Kaufmann, parents of a student in Wright’s Taliesin Fellowship. It is easily Wright’s most iconic residential work, heralded for its representation of his organic approach to architecture and the intertwining of architecture and nature. Wright used sandstone from the area and built the home over a waterfall, its cantilevered design and numerous terraces reflecting the rock ledges of its surroundings.
The main house was completed in 1937 and a guest house was added in 1939. It opened for public tours in 1964, and today, the home includes the Kaufmann’s own art collection and many original interior furnishings chosen by Wright.
08 | Seth Peterson Cottage: Lake Delton, Wisconsin
The Seth Peterson Cottage is one of Wright’s smallest residences, a petite 880-square-foot house nestled amongst the trees of Mirror Lake State Park. The small structure allows most of the interior to be drenched in natural light from the windows and terrace that offer a view of Mirror Lake. The simple layout wraps around a central fireplace. The structure is made largely of local sandstone, flagstone, and wood accents, fully embracing Wright’s organic design ethos.
The house was commissioned by Seth Peterson, an admirer of Wright’s work, in 1957, and both Wright and Peterson died before it was complete. It was abandoned for several years before it was ultimately rescued and restored.
Visit: Not only is the house available for touring, but it’s also open to rent so you can experience living in a Frank Lloyd Wright home yourself.
09 | Bradley House: Kankakee, Illinois
Built in 1900, the Bradley House is an early work by Frank Lloyd Wright, considered to be his first Prairie house. It’s located on one acre of land along the Kankakee River. Of note are the house’s 90 art glass windows, most of which are originals. The Bradley house has passed through numerous hands as a private residence, and even existed as a restaurant, inn, and office space. It was eventually restored to its residential roots and converted to a public museum in 2010.
Visits: The Bradley House offers tours that give a close-up look at both Wright’s house and stable.
10 | Rosenbaum House: Florence, Alabama
The only Frank Lloyd Wright home in Alabama, the Rosenbaum House is one of many examples of Wright’s Usonian designs: low-cost housing intended to help families achieve their homeownership dreams. It is also one of the earliest examples of his Usonian homes.
Originally 1,540 square feet, the Rosenbaum House was built for newlyweds Stanley and Mildred Rosenbaum in 1939. After having children, the Rosenbaums asked Wright to design an addition, adding more than 1,000 square feet in 1948 and demonstrating the ability of his architecture to grow with the American family. Built of wood, brick, and glass, it showcases many characteristics of the Usonian design: a fairly flat structure with multi-level roofs, tall windows, and a carport. It also includes furniture originally designed by Wright for the house. The home was owned by the Rosenbaum family until 1999 when the city took ownership.
The Kalil House is a rare Usonian Automatic House—one of only seven ever built. Constructed with concrete blocks in a modular design, these homes were intended to be even less expensive than Wright’s previous Usonian designs. The result is a look that differs greatly from much of Wright’s remaining residential designs. This 1,406-square-foot home was built in 1955 for Toufic H. Kalil, who knew Wright’s work from the Zimmermans, a couple who had commissioned Wright to design their house on the same street in 1949.
The house only recently became open to the public, after the Courier Art Museum acquired it from private ownership in late 2019.
Visit: A two-hour tour visits both of the Kalil and Zimmerman Houses.
12 | Willey House: Minneapolis, Minnesota
The Willey House holds a unique place in Wright’s career: It was the first commission after Wright established the Taliesin Fellowship, and it is considered to be the beginning of the end for the Prairie school and the beginning of the Usonian designs.
Wright published an autobiography in 1932 that inspired Malcolm and Nancy Willey to contact Wright about creating a home for them. He actually designed two—the first was too large and expensive but the second became the Willey House, completed in 1934. The placement of the kitchen as more open to the rest of the floor plan is a significant change in his work that’s visible in the Willey House. New owners in the early 2000s made preservation a priority.
Much like the Midwest’s flat prairie influence, Wright again found inspiration in nature, this time from the desert and McDowell Mountains. The result is Taliesin West, a structure originally developed largely of rock, wood, cement, and sand.
Organic in style as well as material, it had Wright’s common low-slung profile with strong angles and local color. It was Wright’s winter residence and workspace. Established in 1937, it was frequently developed throughout Wright’s life until he died in nearby Phoenix in 1959. Taliesin West held a drafting studio, residence, and workshops for apprentices, and gathering spaces such as a dining hall and theaters.
Visit: The location is home to the Frank Lloyd Wright Foundation and offers guided and audio tours.
Enjoy these helpful tips and advice in this month’s edition of “Insights on Real Estate”:
1️⃣ Updated Rules for Selling a House;
2️⃣ Enchant Buyers With Stunning Fall Curb Appeal;
3️⃣ Understanding Down Payment Assistance Programs;
4️⃣ The Difference Between a CMA and an Appraisal; and
Let’s connect and plan your next steps. Find out if we’re the right real estate team for you!
CA Real Estate Group | Caliber Real Estate Group
👩🏻 Christine Almarines @christine_almarines
Realtor DRE# 01412944 | 714-476-4637
👩🏻 Anaid Bautista @wealthwithanaid
Realtor DRE# 02179675 | 949-391-8266
Spanish speaking
🏡 15216 Maidstone Ave, Norwalk 90650
🏡 3 bd | 1.75 ba | 1,241 sq ft | 5,000 sq ft lot | $825,000
———– OPEN HOUSE SCHEDULE:
🚩 THU, AUG 15, 3:00-6:30 PM
🚩 FRI, AUG 16, 3:00-6:30 PM
🚩 SAT, AUG 17, 1:00-4:00 PM
🚩 SUN, AUG 18, 1:00-4:00 PM
🍹 Come enjoy our iced tea and iced coffee bar!
———–
🌴 YOU CAN HAVE IT ALL…. Experience the best of modern living with this beautifully remodeled home, complete with a $20,000 NO-REPAYMENT GRANT. Use the grant for a rate buy-down, closing costs, down payment, or a combination of all three.
🌴 This home features 3 bedrooms, 2 bathrooms, and a 2-car garage, plus a convenient in-home laundry room.
🌴 Enjoy a primary bedroom with an en-suite bathroom and a versatile private space that can serve as a gym, office, dressing room, or a possible rental unit.
🌴 Additional highlights include oak wood-like floors, an upgraded kitchen with newer appliances, renovated bathrooms, split AC and a fully finished garage with its own AC and vaulted ceiling.
🌴 Located within walking distance to parks, schools, and stores, this home offers easy access to major freeways (91, 605, 5, 105, 710) and the Norwalk Green Line Station.
🌴 Come see this exceptional property for yourself!
———–
Stop by during our Open House or call and make an appointment for a private showing any day after Aug 15! See more photos of this gorgeous property here: https://marshalladamsmedia.hd.pics/15216-Maidstone-Ave
———–
👩🏻 Christine Almarines @carealestategroup
Buyers Agent Realtor DRE # 01412944
714-476-4637 | christine@carealestategroup.com
CA Real Estate Group | Caliber RE Group
———–
(Listed By Christine Almarines and Caliber Real Estate Group)
🏡 15303 Jersey Ave, Norwalk, CA 90650
🏡 3 bd | 2 ba | 1,434 sq ft | 5,002 sq ft lot | $699,000
———– OPEN HOUSE SCHEDULE:
🚩 SAT, AUG 17, 1:00-4:00 PM
🚩 SUN, AUG 18, 1:00-4:00 PM
———–
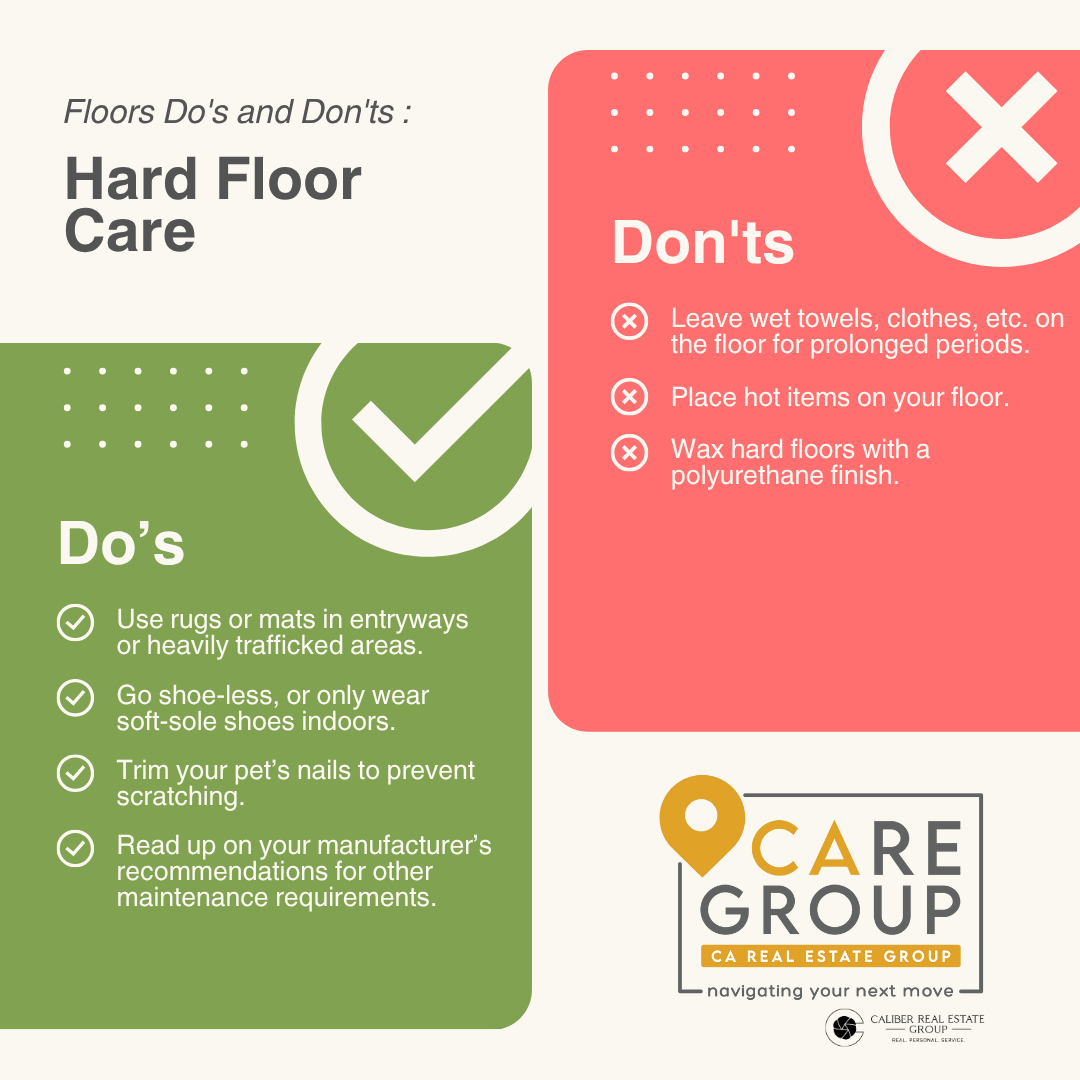
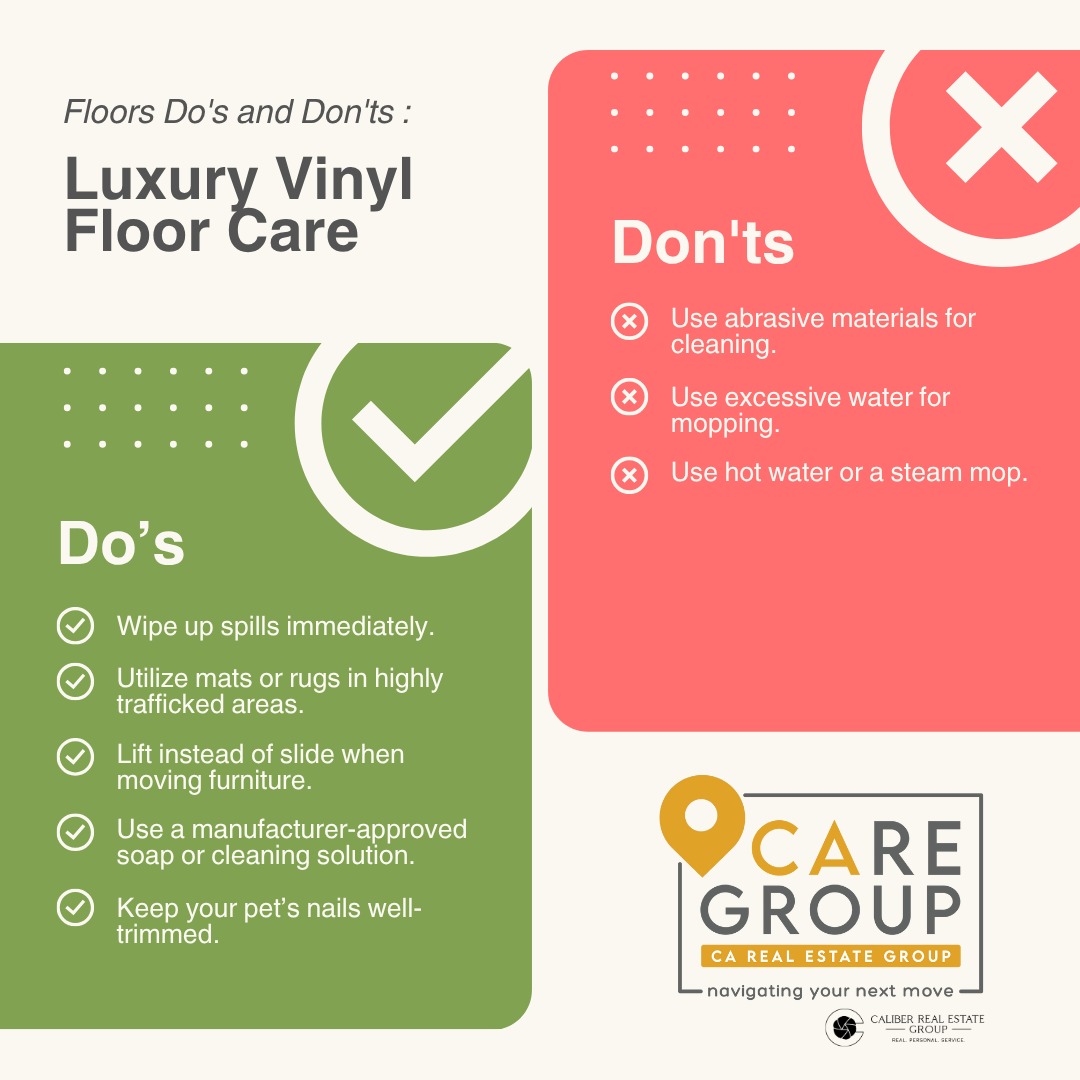
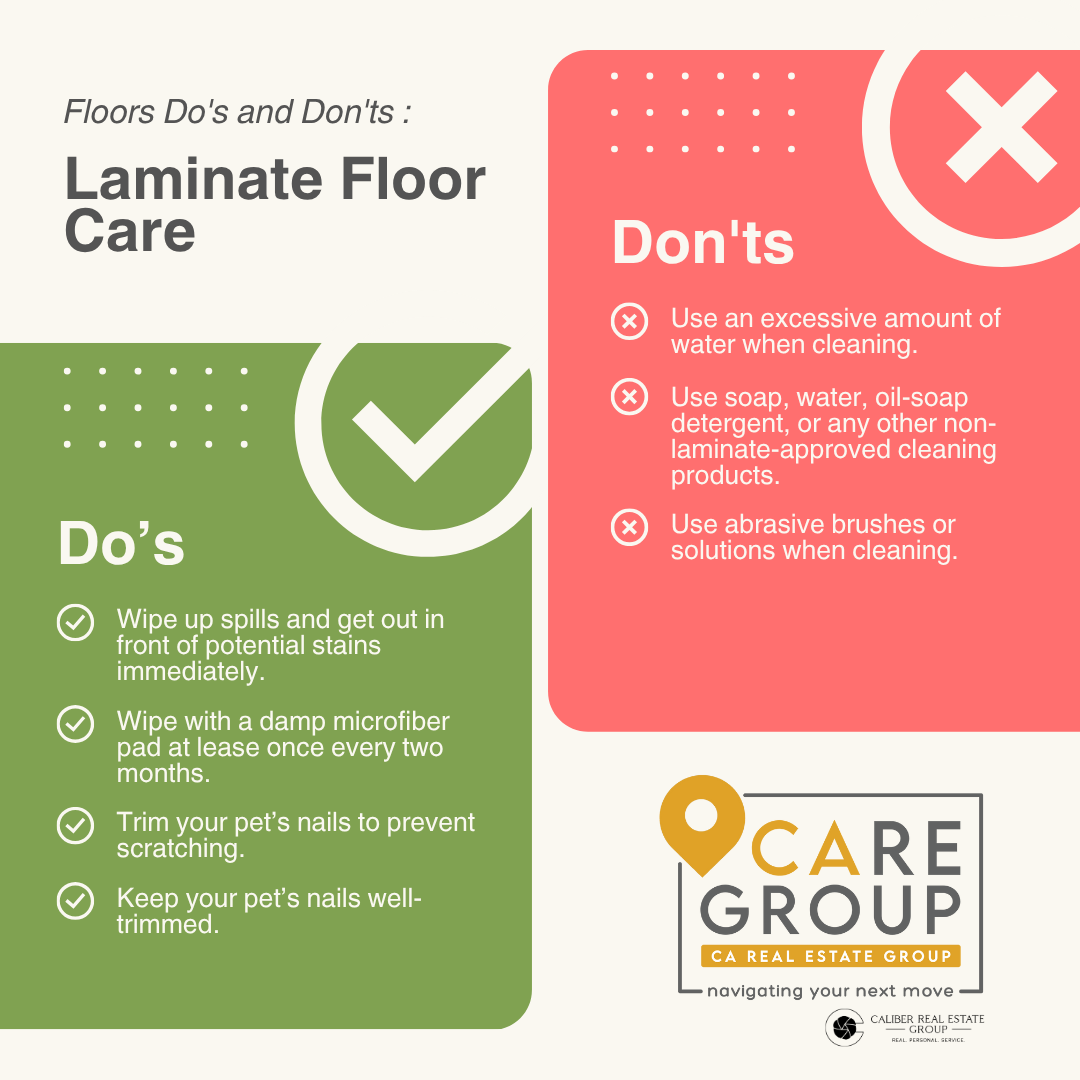
🌴 Spacious living room with laminate flooring opens to the dining room with a built-in cabinet.
🌴 The kitchen has new linoleum, maple cabinets, a Kitchen Aid oven and microwave combo, and a 4-burner cooktop.
🌴 Plenty of cabinet and counter space with a breakfast nook and laundry just off the kitchen area.
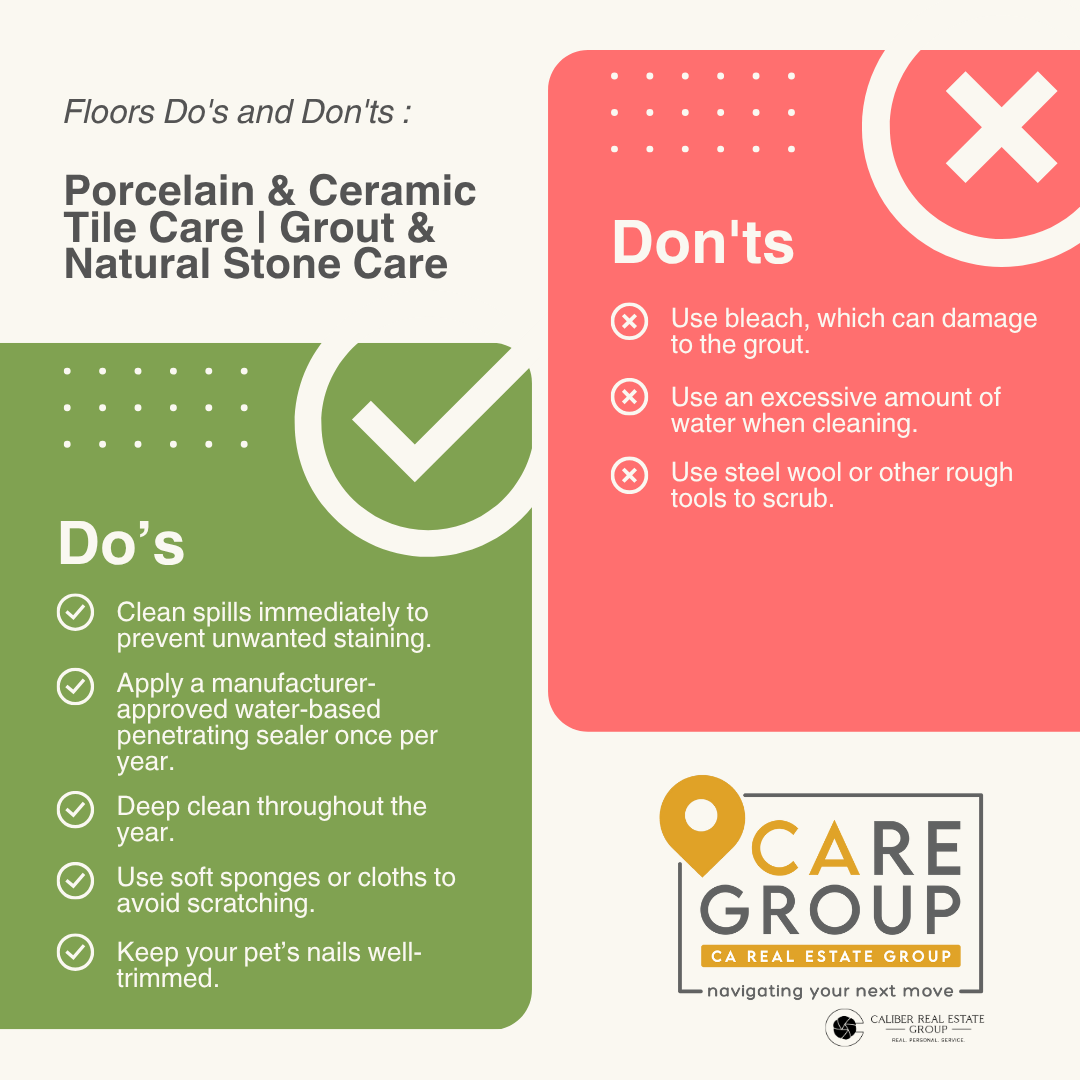
🌴 To service the three bedrooms is the hall bath with tile flooring and a tub/shower combo, sink with a solid Corian-like counter. The other bath also has a shower.
🌴 Double-pane windows, fresh paint both inside and out, and new carpet in all bedrooms.
🌴 The addition family room houses a fireplace, built-in bookshelves, and ¾ bathroom.
🌴 Possible workshop space in the 2- car garage with a newer garage door.
🌴 Amply shaded backyard is mostly brick for ease of care.
———–
Stop by during our Open House or call and make an appointment for a private showing! Take a virtual tour & more see more photos of this gorgeous property here: https://carealestategroup.com/15303-jersey-ave-norwalk/
———–
👩🏻 Anaid Bautista @wealthwithanaid
Buyers Agent Realtor DRE # 02179675
(949) 391-8266 | anaid@carealestategroup.com
CA Real Estate Group | Caliber RE Group
———–
(Listing by Edie Israel [DRE#01399225] and Keller Williams Realty)
Drying your laundry correctly doesn’t have to be complicated. Lean on this guide to simplify your drying routine.
Should you tumble dry low or normal dry? Is it better to dry towels and sheets together or separately? Knowing these laundry best practices can make your clothes last longer, save you energy, and reduce your monthly utility bill. Modern dryers boast an overload of advanced setting combos, from sanitization to activewear and even static-reducing options—which is why getting familiar with your model can help you get the most out of your dryer.
With the help of laundry and appliance experts, we’ve compiled all the do’s and don’ts of drying your clothes at home, whether you have a front- or top-loading dryer. And in case you are traveling (or shopping for a new dryer), this guide will also outline the common dryer settings found in today’s drying machines. The best part: You’ll be able to open your dryer with confidence, knowing your favorite tee hasn’t shrunk two sizes.
Prep Your Laundry Before You Dry
To maximize your laundry success, prevent wrinkles, and reduce your drying time, there are a few steps you can take before starting the dryer. First, sort your laundry before zapping it into your dryer (this step is especially important if you’re using an all-in-one washer-dryer), advises Zachary Pozniak, co-author of the upcoming The Laundry Book. “You should dry items of similar color and weight together,” he says. For example, “Do not dry dark jeans with lightweight white tee shirts. The tee shirt will be dry well before the jeans which will cause the shirt to be heavily wrinkled and covered in dark lint,” he adds.
Second, shake and untangle each piece right before tossing it into your dryer, and always follow your item’s care labels to protect your fabrics. Always be careful not to overload the dryer: Give your pieces some wiggle room to tumble freely inside your machine.
Lint clogged in your lint trap or ductwork can cause hot air from your dryer to spark a flame. Prevent this by keeping your dryer from working overtime—since clogged lint makes it harder for your machine to remove damp air from inside your dryer, resulting in greater energy expenditure and a more costly monthly bill—and clean it regularly.
Basic Dryer Settings
Normal, Regular Dry or Automatic
The hottest temperature a dryer can provide, this setting will tackle heavier items like towels, sheets, and sheets more efficiently, Pozniak says. But depending on your dryer model, this setting will either be labeled normal, regular, or automatic. Each of these cycles typically uses a moisture sensor to determine when clothes are dry, but you can also set a timer based on your preferences, Pozniak explains. He suggests reserving this setting for your most durable items like towels, bedding, sweats, and jeans while avoiding using this cycle on delicate items.
Note that ‘normal’ and ‘timed dry’ are the most popular cycles, according to David Wilson, senior commercial director for clothes care at GE Appliance. Each of these cycles represents around a quarter of all dryer cycles, based on GE’s data of more than 300 million cycles.
Delicate or Gentle
On the other hand, delicate settings use the lowest amount of heat and tumbling action, explains Pozniak. This cycle is best for fragile fabrics or laundry pieces that may start to melt, fray, stretch, or fade in high-heat conditions. Some examples can include activewear, spandex, underwear, lingerie, and sateen sheet sets.
Permanent Press or Wrinkle-Resistant
Wrinkle shield settings will help reduce wrinkles and keep shrinkage at bay. Typically using medium-heat settings, “permanent press is best for synthetic clothes like gym clothes,” says Pozniak, adding, “These garments dry very quickly, so the cycle uses lower temperatures, shorter drying times, and less tumbling to avoid wrinkling.”
Steam Setting
You’ll probably only see this setting on modern dryers, but this cycle adds steam to your laundry load to remove wrinkles. “However, it will not dry your garments, so expect them to be a bit damp to the touch (great for wrinkled bedding),” Pozniak says. “This can be used after a ‘proper’ dry cycle and viewed as a touch-up function.” You can also use this setting to de-wrinkle clean clothing without rewashing, as it uses a mixture of water and heat to revive clothing pieces.
No-Heat or Air-Fluff
This setting uses absolutely no heat, so it will not dry your garments like other settings. Pozniak says this cycle is ideal for stuffed items like duvet inserts, comforters, down jackets, and pillows. In addition, this air fluff setting can also help you remove pet hair and dust from your laundry pieces or even restore volume and freshen up the most delicate fabrics like wool or cashmere.
Quick Dry
Just as the name suggests, you can depend on this cycle to dry a small, light load in the nick of time.
Smart Dryer Settings
Smart dryer iterations are flooding the market right now, allowing you to streamline your laundry routine with intuitive features. For example, some dryers include dryer racks for items that require tumble-free drying (like tennis shoes). Others also come with compatible apps, where you can assign family members laundry tasks through customized texts and even cycle-match to get the perfect dry cycle that matches your load’s wash cycle. Some dryer machines can also be voice-activated when using a compatible voice-enabled device. Below, we’ve outlined a few features that you may want to consider when purchasing your next appliance.
ENERGY STAR-certified dryers follow energy efficiency guidelines set by the U.S. Department of Energy, using up to 30% less energy than standard dryers (and many times cost about the same as standard dryers).
Advanced moisture sensing: This setting is designed to adapt drying times to your garments, which helps prevent over-drying. Multiple sensors monitor the moisture and temperature of your clothes, so your drying cycle will end at just the right time.
EcoBoost: Some appliances come with a EcoBoost option that’s designed to use less heat to maximize energy efficiency.
Static-reduce: This setting combines a mist of water with tumbling after your load drys to further reduce static shock.
Sanitize cycle: A sanitizing cycle can eliminate common household bacteria and bugs (lice, bedbugs, moth larvae) thanks to its high heat levels, which can be ideal for sanitizing sheets or soiled clothing items.
Frequently Asked Questions
What happens if you use the wrong dryer setting?
The most common mistakes include over or under-drying your clothing. “Most shrinkage occurs in the washer, so you’ll likely have a very wrinkled garment from overdrying or one that’s still wet from underdrying,” Pozniak says.
Which dryer settings can be damaging?
“Timed dry can be very harmful as this overrides the moisture sensor,” Pozniak says. “Avoid using it if possible.”
Which items should not go in the dryer?
It’s best to hang or line dry synthetic clothes since they dry super fast, and any extended exposure to heat and tumbling will cause hard-to-remove wrinkling. Pozniak adds that this will break down your garments prematurely. He also advises against putting animal or protein-based textiles (such as silk, wool, and cashmere) in a tumble dryer. Instead, lay them flat on a towel to dry.
Curious about selling your home? Understanding how much equity you have is the first step to unlocking what you can afford when you move. And since home prices rose so much over the past few years, most people have much more equity than they may realize.
Here’s a deeper look at what you need to know if you’re ready to cash in on your investment and put your equity toward your next home.
Home Equity: What Is It and How Much Do You Have?
Home equity is the difference between how much your house is worth and how much you still owe on your mortgage. For example, if your house is worth $400,000 and you only owe $200,000 on your mortgage, your equity would be $200,000.
Recent data from the Census and ATTOM shows Americans have significant equity right now. In fact, more than two out of three homeowners have either completely paid off their mortgages (shown in green in the chart below) or have at least 50% equity in their homes (shown in blue in the chart below):
Today, more homeowners are getting a larger return on their homeownership investments when they sell. And if you have that much equity, it can be a powerful force to fuel your next move.
What You Should Do Next
If you’re thinking about selling your house, it’s important to know how much equity you have, as well as what that means for your home sale and your potential earnings. The best way to get a clear picture is to work with your agent, while also talking to a tax professional or financial advisor. A team of experts can help you understand your specific situation and guide you forward.
Bottom Line
Home prices have gone up, which means your equity probably has too. Connect with local real estate agents like CA Real Estate Group so you can find out how much equity you have in your home and move forward confidently when you sell.
Let’s connect and plan your next steps. Find out if we’re the right real estate team for you!